How to Turn Instagram Reels Into Blog Posts with AI
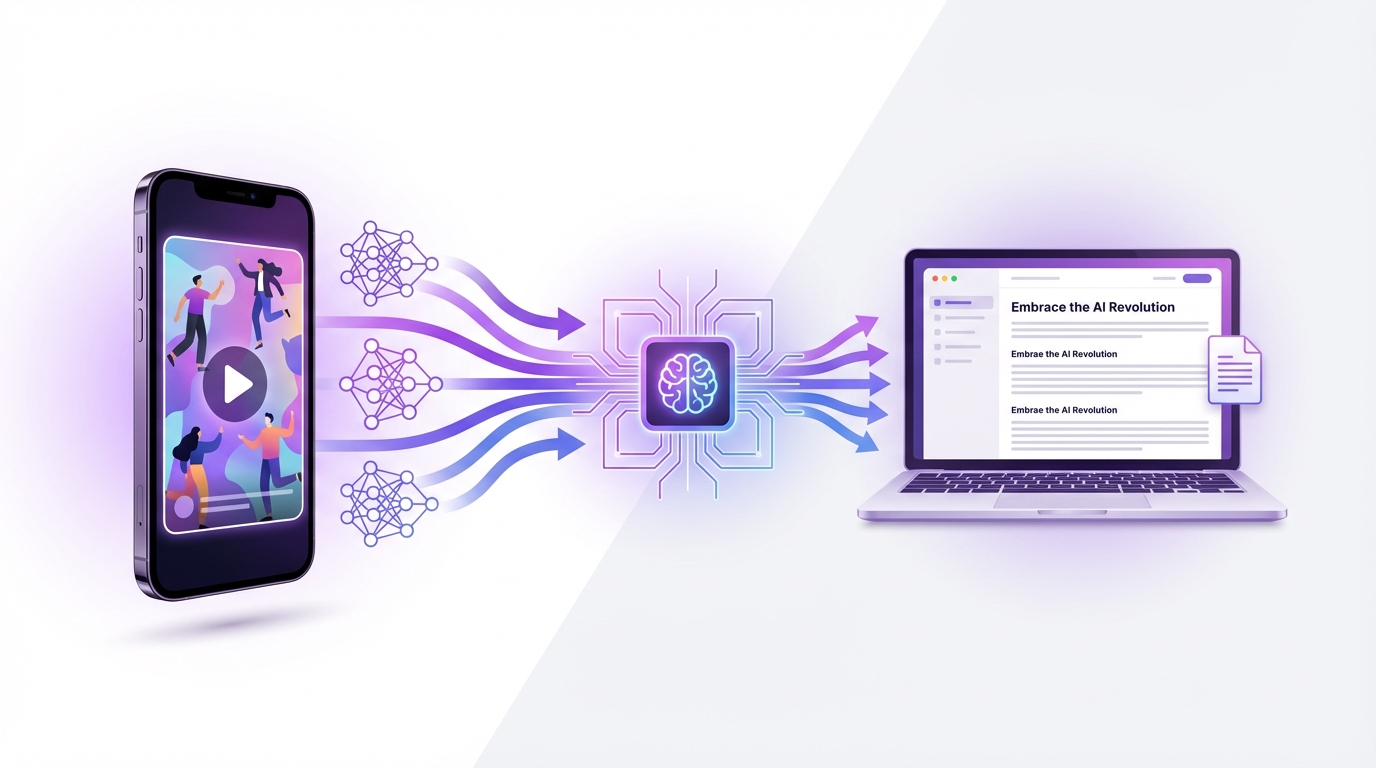
Turn any Instagram Reel into a full blog post using AI transcription. Paste the Reel URL into GetTranscribe.ai, get an accurate transcript in under 60 seconds, then repurpose your video content into SEO-optimized long-form articles — no download required.
Last Updated: April 2026 · By Daniel Vengoechea, AI Systems Builder & Founder of GetTranscribe.ai
The fastest way to turn an Instagram Reel into a blog post is to paste the Reel URL into GetTranscribe.ai/instagram-transcription, receive an accurate transcript in under 60 seconds, then use that transcript as the foundation for a full article. The entire workflow — from raw Reel to publish-ready blog post — takes less than 30 minutes, no video download required.
TL;DR — Quick Summary
- Paste any Instagram Reel URL into GetTranscribe.ai and get a full transcript in under 60 seconds
- 95%+ accuracy for clear English audio; 30+ languages supported with automatic detection
- Use the transcript as the skeleton for a 1,500–2,500 word SEO blog post
- One Reel → one blog post, one newsletter section, multiple social captions — all from the same transcript
- Trusted by 12,000+ creators and businesses; SOC 2 Type II certified, GDPR ready
- Plans from $7.99/month; pay-as-you-go credit packs available
Why Creators Turn Instagram Reels Into Blog Posts
Instagram Reels are one of the most powerful short-form content formats on the internet — but they have a fundamental limitation: discoverability. A Reel reaches your existing followers and whoever Instagram's algorithm serves it to in the first 48–72 hours. After that, traffic drops to near zero.
A blog post is the opposite. Publish once, rank for years. A well-structured article targeting the right keyword can drive consistent organic traffic from Google every single month, compounding over time without any additional effort.
The opportunity most creators miss: every Reel you've published already contains a blog post. The hook, the structure, the key insight, the examples — it's all there. It's just locked inside a video format that search engines can't index. Transcription is the key that unlocks it.
Here's why this workflow is accelerating among creators, social media managers, and marketing agencies:
You Already Did the Creative Work
Planning a Reel — researching the topic, writing the hook, structuring the argument, filming, editing — is the hard part. Converting it into a blog post is the easy part. With AI transcription, the conversion step takes under 60 seconds. The rest is editing and formatting.
Search Engines Can't Watch Videos
Google cannot index the audio or video content of an Instagram Reel. It can only index text. Every Reel you publish is invisible to organic search unless you convert it into a written format. A blog post built on your Reel transcript is a new search-indexable asset that can appear in Google results indefinitely.
Double Your Audience Reach
Your Instagram audience and your Google search audience are largely different people. A creator with 50,000 Instagram followers might have zero blog presence — meaning they're missing an entirely separate audience that discovers content through search. Repurposing Reels into blog posts lets you reach both with the same ideas.
Content Calendar Efficiency
Creating original blog content from scratch takes 4–8 hours per article. Building a blog post from an existing Reel transcript takes 30–45 minutes. For creators publishing 3–5 Reels per week, this workflow generates a full content library of blog posts without proportionally increasing the time investment.
What You Need Before You Start
Getting started with the Reel-to-blog workflow requires minimal setup. Here's the full list:
Required:
- A public Instagram Reel URL (your own content, or content you have rights to repurpose)
- A GetTranscribe.ai account — free to start, no credit card required
- An AI writing assistant: ChatGPT, Claude, or Gemini (free tiers work well)
- A blog platform: WordPress, Ghost, Webflow, Notion, Substack, or any CMS
Optional but recommended:
- The GetTranscribe Chrome Extension — right-click any video to transcribe without switching tabs
- A keyword research tool (Ahrefs, SEMrush, or Google Search Console) to validate your blog topic before writing
- A content calendar to track which Reels you've already repurposed
What you do NOT need:
- Any video editing software
- To download the Instagram video (GetTranscribe works directly from the URL)
- A professional copywriting background
- Hours of free time
Step-by-Step: Transcribe an Instagram Reel and Turn It Into an Article
Here is the complete, production-ready workflow for turning any Instagram Reel into a published blog post.
Step 1: Get a Clean Transcript from the Reel URL
This is the step that changes everything. What used to take 30–60 minutes of manual transcription now takes under 60 seconds. Using an Instagram Reels transcript generator like GetTranscribe, you can convert any public Reel into clean, editable text in moments.
How to get your Instagram Reel transcript:
- Open the Instagram Reel you want to repurpose (on mobile or desktop)
- Tap the three-dot menu (⋯) on the Reel → select Copy Link
- Go to gettranscribe.ai/instagram-transcription
- Paste the Reel URL into the transcription field
- Click Transcribe — your full transcript is ready in under 60 seconds
What you receive:
- Full verbatim transcript as clean, readable plain text
- 95%+ accuracy for clear audio in English
- Automatic language detection across 30+ languages
- Clean output ready to copy into any writing tool
Note: The Reel must be publicly accessible. Private Reels cannot be transcribed via URL. If your Reel is private, temporarily set it to public, copy the link, transcribe it, then restore the privacy setting.
For creators managing multiple brands or processing Reels in bulk, GetTranscribe's bulk transcription feature lets you queue multiple URLs and process them simultaneously — a major time saver for agencies.
Step 2: Pull Out the Hook, Core Points, and Examples
Your raw transcript is the raw material — not the finished product. Before expanding it into a blog post, extract its structural skeleton.
Read through the transcript once and identify:
- The hook — the opening sentence or two that grabbed attention. In your blog post, this becomes your lead paragraph or H2 intro.
- The core claim or main insight — what is the one thing this Reel teaches or argues? That becomes your article's thesis.
- The key supporting points — sub-arguments, steps, examples, or data points. These become your H2 and H3 sections.
- The examples or stories — specific cases that made the Reel concrete. These become body paragraphs within sections.
- The call to action — what the Reel asks viewers to do. Adapt this into your blog's CTA and internal links.
Remove before expanding:
- Filler words: "um," "uh," "like," "you know," "basically," "right?"
- False starts and repeated phrases
- Video-specific references: "click the link in bio," "save this post," "follow for more," "as you can see" — these make no sense in written form
For a 30–60 second Reel, this structural extraction takes 5–10 minutes. The result is a clean content skeleton ready to expand.
Step 3: Expand the Transcript Into a Blog Outline
A 60-second Reel generates approximately 120–180 words of usable transcript. A quality blog post targets 1,500–2,500 words. That means you're expanding by roughly 10–15x — which sounds daunting but is straightforward with the right AI workflow.
The AI prompt that works:
Paste your cleaned transcript into ChatGPT or Claude with a prompt like this:
"Here is a transcript from my Instagram Reel about [topic]. Please turn this into a well-structured blog post of approximately [1,500–2,000] words. Keep my voice, main points, and examples intact. Add context, depth, and explanatory detail where the spoken content is thin. Use proper H2 and H3 headings. Add a clear intro paragraph that states the main insight, a TL;DR bullet list near the top, and a conclusion with a call to action. Do not add information that wasn't in the original transcript unless it's standard explanatory context."
What the AI will produce:
- A structured first draft in blog format
- Proper heading hierarchy
- Expanded explanations around your core points
- A workable length for optimization and editing
This is the draft — not the final article. You'll edit it significantly in Steps 4 and 5.
For a more automated version of this workflow, GetTranscribe's ChatGPT MCP integration lets you feed transcripts directly into your AI workflow without manual copy-pasting. You can also use Make or the n8n Instagram + TikTok automation to fully automate the transcription-to-draft pipeline.
Step 4: Add SEO Structure, Headings, and Internal Links
The AI draft gives you the content. Now make sure search engines — and AI search engines — can find and surface it.
Title (H1): Your blog title should be optimized for search intent, not Instagram engagement. Formula: Primary Keyword + Benefit/Context
Example: "How to Turn Instagram Reels Into Blog Posts with AI (Step-by-Step Workflow)"
Meta title (50–60 characters): Include your primary keyword near the front. Meta description (150–160 characters): Include the keyword, a key benefit, and a reason to click.
Heading structure: Map every major section to an H2. Every sub-point or step within a section gets an H3. Search engines use heading hierarchy to understand content; AI engines use it to identify extractable answers. This is non-negotiable for 2026 ranking.
Internal links (add 3–5 per post):
- Instagram Transcription — your product landing page, most important link
- How to Repurpose TikTok Videos Into Blog Posts — related workflow for TikTok creators
- How to Extract a Script from Any Viral Video — for competitive research angle
- ChatGPT Integration — for AI-assisted writing workflow
- Pricing — for commercial intent readers
FAQ section: Add 6–10 frequently asked questions at the end of every post. Format the question as an H3 and place the answer immediately below as prose. This qualifies for FAQPage schema markup, which can earn rich results directly in Google search — significantly increasing click-through rates.
Step 5: Edit for Readability, Accuracy, and Brand Voice
The AI-generated draft needs human editing before publication. This is where quality is built.
Readability edits:
- Break up paragraphs longer than 4 lines — blog readers scan before they read
- Add bold text to key facts, claims, and takeaways
- Convert dense prose into numbered lists or bullet points where appropriate
- Add a TL;DR summary near the top — pages with TL;DR sections are 3.2x more likely to be cited by AI search engines
Accuracy check:
- Verify every factual claim in the draft — AI may have added "context" that's inaccurate
- Confirm product details, pricing, and statistics are current
- Remove any generic AI filler phrases ("In today's digital landscape," "It's crucial to note that")
Brand voice:
- Replace generic language with how you actually talk
- Add specific examples from your experience that weren't in the transcript
- Restore any signature vocabulary or phrasing that the AI softened
Image alt text: For every image, write descriptive alt text incorporating your target keyword naturally. Example: "Step-by-step process to transcribe an Instagram Reel and turn it into a blog post using GetTranscribe.ai AI transcription."
Step 6: Publish and Repurpose the Post
Once the article is edited and ready, publish it to your blog. But don't stop there — the blog post itself becomes a new asset for multi-channel repurposing:
- Email newsletter: Take the TL;DR bullets + 2–3 strongest paragraphs → one newsletter edition
- LinkedIn article: Trim to 600–800 words, add a personal note → publish to LinkedIn
- Twitter/X thread: Each H2 section = one tweet in a thread
- New Instagram caption: Pull the strongest 2–3 sentences from the article → caption for your next Reel on the same topic
- YouTube video script: Expand the article outline back into a longer-form YouTube script
One Reel generates a transcript. One transcript generates a blog post. One blog post generates 5+ additional content pieces. That is the compounding value of this workflow.
If you want to analyze or repurpose the transcript directly inside ChatGPT, the native MCP workflow with GetTranscribe is the next step.
Comparison Table: Manual vs. Generic AI vs. GetTranscribe Workflow
When it comes to turning Instagram Reels into blog posts, there are three common approaches. Here's an honest comparison:
| Approach | Transcription Method | Time to Transcript | Accuracy | Platforms Supported | Blog-Ready Output | Cost |
|---|---|---|---|---|---|---|
| Manual typing | Watch and type | 30–60 min/Reel | ~100% | Any | ✅ Yes — very slow | Free (time cost) |
| Platform auto-captions | Instagram's built-in | Instant | 60–75% | Instagram only | ❌ No — subtitle format, not exportable | Free |
| Generic AI tool (upload) | File upload required | 5–15 min (incl. download) | 80–93% | Limited social | Partial | $10–30/mo |
| GetTranscribe.ai (URL paste) | Paste Reel URL | Under 60 seconds | 95%+ | 7 platforms | ✅ Clean plain text | From $7.99/mo |
The critical advantage of the GetTranscribe workflow: No download is required. Competitors like Transkriptor, Otter.ai, and Happy Scribe require you to first download the Instagram video — which Instagram actively makes difficult — and then upload it. GetTranscribe works directly from the Reel URL. Paste. Transcribe. Done.
Instagram has no native transcript export for Reels, making URL-paste transcription the only practical option for creators who work at volume.
Best Practices for Turning Short-Form Video Into Long-Form Content
After converting dozens of Reels into blog posts, these are the practices that produce the best results:
1. Pick Reels that performed well — they already validated the topic. Don't start with your worst-performing Reels. Start with the ones that got the most saves, shares, or comments. Those signals tell you the topic resonated. If it resonated on Instagram, there's a strong chance there's organic search demand for it too.
2. One Reel = one article section, or one full article. A 15–30 second Reel is best used as the basis for one strong H2 section within a larger article. A 60–90 second Reel can anchor a full 1,500–2,000 word post. Combine 3–4 short Reels on the same topic into one comprehensive guide.
3. Do keyword research before you expand — not after. Before investing time expanding a transcript, validate there's search demand. Use Google Search Console, Ahrefs, or even Google's autocomplete to find the specific phrasing your audience uses. Let the keyword guide your title, headings, and how you frame the content.
4. Add original depth that the Reel couldn't contain. Reels are constrained to 90 seconds. Blog posts are not. Use the blog format to add what you couldn't fit in the Reel: data and statistics, step-by-step walkthroughs, comparison tables, screenshots, FAQs, and links to related resources. This is what differentiates your article from a simple transcript dump.
5. Use a consistent formatting template. Create a repeatable article structure: Intro → TL;DR → Why section → How-to steps → Comparison table → Best practices → FAQ → CTA. Using the same structure for every repurposed Reel makes the workflow faster and trains your readers to expect a consistent format.
6. Schedule publication systematically. If you publish 3 Reels per week, set aside two hours on Friday to transcribe and draft that week's blog posts. Batch the work. One session per week produces 3 new articles — 12+ per month — from content you've already created.
Common Mistakes to Avoid
Even experienced creators make these errors when repurposing Reels into blog posts:
Publishing the raw transcript without editing. A verbatim transcript reads like spoken word, not written content. The filler words, the repetition, the video-specific callouts ("tap the link in bio") — all of it needs to be removed. A raw transcript is a starting point, not a finished article.
Choosing topics based on Reel performance alone without checking search demand. A Reel with 100K views doesn't automatically mean there's Google search traffic for the same topic. "Storytime" and entertainment Reels rarely have keyword traffic. Educational and how-to Reels almost always do. Use a keyword tool before expanding.
Writing a blog post that's just a longer version of the Reel — no additional value. Google rewards content that's genuinely more comprehensive than what exists elsewhere. If your blog post is only 400 words built from a 30-second Reel, it has almost no chance of ranking. Expand significantly: add context, data, comparison tables, FAQs, and original examples.
Missing internal links. Every blog post you publish should link to related content on your own site. Internal links distribute authority, keep readers on-site longer, and help search engines understand your content structure. Aim for 3–5 internal links per post.
Skipping the FAQ section. FAQs are one of the highest-ROI elements in any blog post. They capture long-tail keyword traffic, qualify for FAQPage structured data markup (which can earn rich results in Google), and are disproportionately cited by AI search engines. Never publish without one.
Not repurposing the blog post further. The blog post is not the end of the repurposing chain — it's a new asset in it. Share the blog post to your email list, pull quotes for LinkedIn, and turn the article's key points into your next Reel. The best creators run a full content loop, not a one-way pipeline.
Why GetTranscribe Works Well for Instagram Content Repurposing
GetTranscribe.ai is purpose-built for social media video workflows. It's not a general transcription tool with Instagram support bolted on — it's a URL-first platform designed for creators, agencies, and marketers who work with social content daily.
URL-first workflow: Paste any Instagram Reel URL and get a transcript in under 60 seconds. No download, no file management, no extra steps. This is the fastest path from Reel to transcript available in 2026.
Broad platform support: GetTranscribe supports Instagram, TikTok, YouTube, Facebook, Pinterest, Twitter/X, and Google Drive — all from a single URL paste. If your repurposing strategy spans multiple platforms (and it should), you need one tool, not seven.
API and automation integrations: For agencies and power users, GetTranscribe's REST API, n8n native node, Make integration, and Zapier support enable fully automated transcription-to-content pipelines. New Reel URL submitted → auto-transcribed → transcript fed to AI → draft sent to CMS. No manual steps.
Folder organization and bulk transcription: Organize transcripts by brand, client, or content series using GetTranscribe's folder system. Process multiple Reels simultaneously with bulk transcription — critical for agencies managing multiple accounts.
Security: SOC 2 Type II certified, GDPR ready, AES-256 encryption. Enterprise-grade security at creator-friendly prices.
Flexible pricing: Plans start at $7.99/month (Basic: 50 video minutes/month). The Starter plan at $9.99/month covers 150 video minutes — enough for 150+ standard Reels. Pro at $29.99/month offers 500 video minutes plus 1,500 AI messages, ideal for agencies running this workflow at volume. Pay-as-you-go credit packs are available for flexible usage.
Frequently Asked Questions
How do I transcribe an Instagram Reel into text?
To transcribe an Instagram Reel into text, open the Reel, tap the three-dot menu, and select Copy Link. Paste that URL into GetTranscribe.ai/instagram-transcription and click Transcribe. Your full Reel transcript appears as clean, editable text in under 60 seconds — no download required. GetTranscribe achieves 95%+ accuracy for clear audio in English and supports 30+ languages automatically.
Can I turn an Instagram Reel into a blog post?
Yes. The fastest workflow is: (1) copy the Reel URL, (2) paste it into GetTranscribe.ai to get a transcript in under 60 seconds, (3) use the transcript as the foundation for a blog post by expanding each key point, adding headings and SEO elements, and editing for readability. A 60–90 second Reel can produce a 1,500–2,000 word blog post in under 30 minutes using this AI-assisted workflow.
What is the best tool to transcribe Instagram Reels?
GetTranscribe.ai is the leading tool for Instagram Reel transcription because it works directly from the Reel URL — no download required. Paste the Instagram link, receive a 95%+ accurate transcript in under 60 seconds, and copy it into any writing workflow. Competitors like Transkriptor and Happy Scribe require you to download the video file first (which Instagram makes difficult), adding 5–10 minutes of friction per Reel.
How long does it take to turn a Reel into a blog post?
The transcription step takes under 60 seconds using GetTranscribe.ai. Extracting the structure and cleaning the transcript takes 5–10 minutes. Expanding with AI (ChatGPT or Claude) takes 2–5 minutes. Editing for accuracy, voice, and SEO takes 15–20 minutes. Total: 25–40 minutes from Reel URL to a publish-ready blog post draft.
Do I need to download the Instagram Reel to transcribe it?
No. GetTranscribe.ai works directly from the Instagram Reel URL — no download is required. Copy the Reel link (three-dot menu → Copy Link on Instagram), paste it into GetTranscribe.ai, and receive your transcript. This is the key advantage over file-upload transcription tools, which require downloading the video first — a step Instagram actively makes difficult.
What are the SEO benefits of turning Reels into blog posts?
Instagram Reels are invisible to Google's organic search index — search engines cannot index video audio or content. A blog post built from a Reel transcript is fully indexable, can rank for keyword queries, and drives compounding organic traffic over months and years. A creator who publishes 3 Reels per week and repurposes each one into a blog post generates 12+ new SEO assets per month with no additional creative effort.
Can I repurpose Instagram Reels I didn't create?
Only repurpose Reels you own or have explicit rights to use. Transcribing and publishing someone else's content without permission may violate copyright law and Instagram's Terms of Service. GetTranscribe is designed for creators repurposing their own content or content they're licensed to use. For competitor research purposes, transcription is appropriate for analysis and insight — not for reproduction.
Does GetTranscribe work for Instagram Reels in languages other than English?
Yes. GetTranscribe.ai supports 30+ languages with automatic language detection. You do not need to specify the language manually in most cases — the AI detects it from the audio and transcribes accordingly. Supported languages include Spanish, Portuguese, French, German, Italian, Japanese, Korean, Chinese (Mandarin), Hindi, Arabic, Dutch, Turkish, and many more. Accuracy for non-English audio is typically 90–95% in clear conditions.
How many Instagram Reels can I transcribe per month?
It depends on your GetTranscribe plan. The Basic plan ($7.99/month) includes 50 video minutes. The Starter plan ($9.99/month) includes 150 video minutes. The Pro plan ($29.99/month) includes 500 video minutes. A typical 60-second Reel uses 1 video minute. At 150 video minutes, the Starter plan covers 150 Reels per month — more than enough for most creators. Pay-as-you-go credit packs are also available for flexible volume. See all pricing →
Can I automate the Reel-to-blog workflow?
Yes. GetTranscribe.ai's n8n Instagram + TikTok automation and Make integration enable fully automated pipelines: new Reel URL submitted → GetTranscribe auto-transcribes it → transcript fed to AI writing tool → draft sent to CMS or Notion. The REST API enables custom automation for developers. This workflow scales from a solo creator to an agency processing hundreds of Reels per week.
Conclusion: Start Repurposing Your Reels Today
Every Instagram Reel you've published is a blog post waiting to be unlocked. The creative work is already done. The research, the hook, the structure, the insights — it's all there, locked inside a video format that search engines can't index and that stops generating views after 72 hours.
The Reel-to-blog workflow changes that equation entirely. One 60-second Reel, processed in under 60 seconds with GetTranscribe.ai, becomes the foundation for a 1,500+ word blog post that can drive organic search traffic for years.
Your action plan:
- Pick your best-performing recent Reel
- Copy the Reel link (three-dot menu → Copy Link)
- Go to gettranscribe.ai/instagram-transcription — paste the URL, get your transcript in under 60 seconds
- Use ChatGPT or Claude to expand the transcript into a full blog draft
- Add SEO structure: title, meta, headings, internal links, FAQ
- Publish — and repurpose the article into your newsletter, LinkedIn, and next week's Reel
GetTranscribe.ai is trusted by 12,000+ creators and businesses to turn social media video into text — accurately, instantly, and without the friction of downloads or file uploads. SOC 2 Type II certified. GDPR ready. Free to try — no credit card required.
→ Transcribe your first Instagram Reel free — gettranscribe.ai/instagram-transcription
GetTranscribe.ai also supports TikTok transcription, YouTube video transcription, Facebook video transcription, Pinterest video transcription, and Google Drive transcription — one tool for every platform where your content lives. Automate via REST API, n8n, Make, and Zapier.